Showing posts with label WIP. Show all posts

The Lord of the Rings, part I: Three into one

You ever get into those pissing contests where you try to do something for the longest time or prove you have the most of something or make the biggest thing just to see if you can? Maybe it's not even that advisable, but man didn't make it to the moon by sitting at home worrying about whether it was a dumb-shit thing to do just to prove you could do it—you know what I mean?

What I'm trying to say here is that I've taken a three-volume boxed set of The Lord of the Rings and I'm going to put it all between one set of covers.

The fact that I don't have a lot of cover board in stock has nothing to do with this, nor does my fetish for combining bookbinding with chainmaille as soon as humanly possible and I have this vision of a sheet of fine maille draped over an absurdly wide leather book spine. Just, okay, just picture this monstrous concoction on your bookshelf taking up more attention span than the entire Encyclopedia Brittanica. It's going to be beautiful and, somehow, I hope to God, not prone to structural collapse.

So here's what I started with.

Pretty unexciting mass-market paperback boxed set of the trilogy. I stripped off the covers and spines, then whittled out pages that I wouldn't need. The single-volume edition will only need one map section, whereas currently I have three. Really just need one copyright page too. Actually, all these title pages should get consolidated into one. Stuff like that. I printed off a few custom pages to tip in where needed and make the whole thing cohere.

Speaking of cohering, it soon became obvious that no amount of fresh glue was going to bring these three volumes into one, not without two very obvious parts in the spine. I decided the way to make everything work out was to first break the whole thing down into much smaller chunks, then bring all those together so as to avoid two big obvious breaks in favor of many little ones. Alvenh Channe led the way with this excellent tutorial on overcast sewing, a technique designed for single sheet binding.

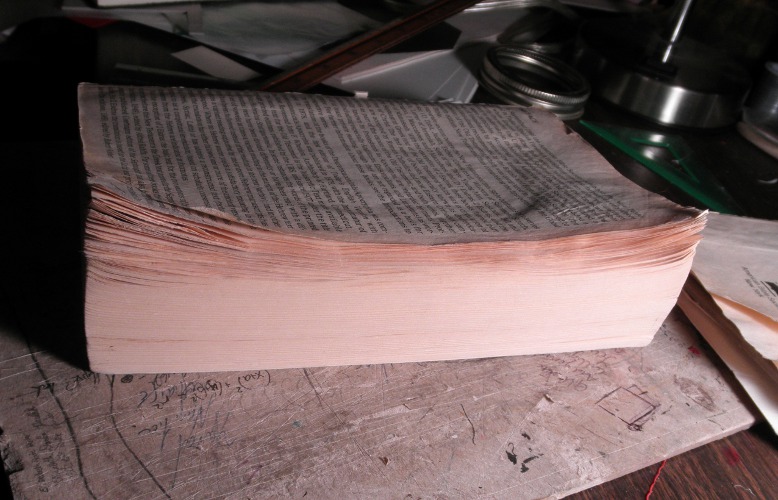
So, after some quality time with a very sharp knife and an incredibly tiny drill bit, I got my signatures all ready for stitching. After even more time with a needle and a good amount of thread, I finished up with this wonderfully monstrous cinderblock of text:

I don't know about you but I'm pretty excited to see this thing on a bookshelf once it's all grown up.

Some stats, if you're into numbers at all: It has 1137 pages of content for 591 total sheets of paper (with title pages, tables of contents, etc.). The pages are chunked into 16-sheet groups, of which there are 37, each with 10 holes. The needle passes through each of these holes twice, so that's 740 stitches. Number of times I stabbed myself with the needle: just once!

Family Bible, part II

Work continues on the CCD Bible. The goal was to get most of the work done this weekend, and I did in fact get everything structural done. The first task was straightening out the curled page corners. First I tried pressing them, which did nothing, so I progressed to a medium-heat iron. That did the trick. The pages are not perfectly flat, but they are lying straight now and I'm thinking that, after they are pressed in the final stages, they will condense more.

With that taken care of, the text block was ready to be prepared for a hardcover structure. I tipped in the detached first two pages and then added endsheets on top of those. The endsheets are a plain but high-quality, ivory, 100% cotton paper; this seemed more suitable to the plain, functional purpose of the book than something with a pattern.

Once the endpapers were in place, I covered the spine with cheesecloth super and kraft paper after adding a marker ribbon. The text block is now ready for casing in -- at least, unless I figure out a way to add headbands, which I really want to do.

Meanwhile, the cover was coming together. The boards are 0.080" Davey board, pasted onto a manilla-folder spine per my usual construction. The next step is to cover them with cloth, but before that happens I need to try printing onto the cloth.

Stay tuned for the final stages: finishing the cover boards, and then using them to case in the text block!

Family Bible

Hello everyone! I haven't posted in a while -- I actually have sort of a day job now, which I absolutely love but it does leave me with less time to play around at home. I do, however, have a new project.

This paperback Bible was with my client and her siblings all through CCD school. It has suffered the complete detachment of its front cover, and the first 200 or so pages are curled at the corner.

The spine, however, is in surprisingly good shape, and most of the pages are intact despite the curling.

In its current state, this book is not fully usable, but the sentiment it carries makes it worth saving. I will therefore be reinforcing it and giving it a new, red cloth cover.

More pictures to follow as I progress.

Tiny books are cute and anthropomorphic

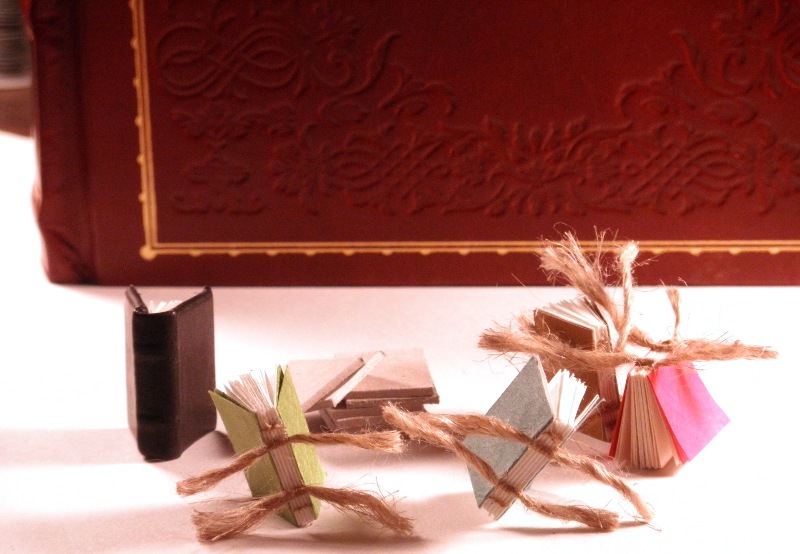
I am making several tiny books to sell as pendants at an upcoming renaissance faire... I quickly discovered that they have an irresistible personality!


Here's Shep, a book dog.


He belongs to these bookly citizens.


Is that...a bird?  Or a plane?


A well-dressed stranger visits the town.
The bookly citizens gather to admire her gilded wardrobe.


Shep finds something interesting.


The book boards for everyone's hard covers have arrived!  Everyone gathers to see, and the town elder claims the podium to regale them with his tale of The Day I Earned My Covers.


Suddenly, in the middle of his tale -- a GOD descends -- !
The citizens stumble backward in awe!


While the others stand frozen, the town elder steps forward, fearless.
"Are you sure that's wise?" protests the gilded newcomer.
"Perhaps not, but the spirit of ADVENTURE compels me!"


The bookly god is benevolent and takes them to see the Promised Land of Bookshelf. Someday, when all the bookly citizens have earned their covers, they will come here to live among the great ones.

To be continued...

Plato's Makeover

Good afternoon! I've figured out a specific line of work for myself, and the first project is under way now. It was my dad's idea. He's a professor of philosophy, and here's his copy of Plato's Gorgias which is older than I am:

As you can see, it's not in good shape. The spine has cracked down the middle, and pages are falling out. He'd buy a new copy, but this one is full of two decades' worth of notes. It's a perfect candidate for re-binding.

While I'm working on the Gorgias, I'll also re-bind Dad's classroom copy of the Republic as a matched companion. Here they are with newly reinforced spines, waiting for a shipment of nice papers so I can make their covers.

I'll keep you all posted and show you finished pictures soon!

In progress: rebinding paperbacks

A quick trip to my library's bargain used book corner landed me with $6 worth of ready-made text blocks to practice binding. Here's what's on the workbench right now:

I don't feel bad about potentially destroying a dictionary, so this one seemed like a good guinea pig. Next up maybe I'll give Emily Bronte or Ralph Waldo Emerson a shot, and eventually I'd like to rebind my friend's Lord of the Rings trilogy and my own Elements of Euclid.

In addition to the German/English dictionary, I also have an ancient Passport to French book under surgery. Here they both are with endpapers and mull applied; the French book has an elegant, subtle pinstripe on the endpapers, while the German book has ivory 100% cotton endpapers.

I'll be casing them in once their covers are done drying. Speaking of, here's my new favorite tutorial for making the cover: Dave's Book Tutorial. His advice to use a manila folder makes for a lovely joint, and the spines of these books will be hollow (finally!). Plus, easy-peasy very pretty French groove = bonus!

The Tome, part V: Right, so this part is nervewracking

I'm applying the leather. Like, right this second. I ran upstairs to do a post while waiting for a section to dry.

Scary! But so far, it's going okay; in fact, it's more beautiful than I could ever have hoped. Look how the structure of the cords shows through on the front. I'm surprised that's visible, but I think it looks awesome.

Go to: Part IV | Part VI

The Tome, part IV: Preparing the cover

Remember how I said this book was going to have to be leatherbound? Well, it is, and now I have the leather. For this, I went to Ann Arbor last Saturday to pay homage to Hollander's Store of All Things Bookish and Beautiful. Seriously, they have everything. Try not to drool on the very expensive papers. (There, now you have my birthday wish list.)

They did have some of the best bookbinding leather, which is morocco goatskin, but it was prohibitively expensive and I don't think I'm exactly worthy of it yet. Instead, I brought home a small hide of calf leather in black, along with a sheet of French marbled paper for the endpapers.

To practice working the leather, I overlaid a scrap onto a carved block of wood, producing the J. R. R. Tolkien monogram in the photo. At this point, I started feeling a little overwhelmed by the magnitude of my first leather project. I very nearly chickened out and revised my plan to a quarter-bound book, using leather only on the spine and that marbled paper as the cover material. However, while that would still be good-looking and no doubt wiser, I don't think it would satisfy what I hoped to achieve with this journal. Remember, it has to be

  • of an epic scale and
  • ornate,

and furthermore, as per Brian's hints and nudges, it should ideally incorporate

  • some Celtic knotwork,
  • his 40k coat of arms, and
  • a volume number (he'll have more birthdays).

If tooling, stamping, and/or gold leafing can be worked into that arrangement, all the better.

So, I reconsidered and came up with a feasible design. The main feature will be a raised insignia; I expect that such dimensionality will add an extra sense of weight to the tome, and besides, it's easier than tooling. The design is intentionally massive and not terribly detailed—or, as I like to think of it, uncluttered—which will be easier on my novice hands. However, I still find it aesthetically pleasing.

The olive branches and volume number will be tooled. Whether this will involve more or less work than cutting out the cardboard for the raised areas, I couldn't say, because that was an absolute pain.

Have a look at the spine, which will feature raised bands, and at the ribbon marker poking out from under the headband:

Right, so, the next step is to cover it all with leather. Wish me luck!

Go to: Part III | Part V

Painting miniatures

A quick update on the tome: I'm planning a trip to Ann Arbor for leather, but that has to wait until next Saturday. I'll be working on cover designs until then and hopefully will have a post going up in the next few days.

In the meantime, here's something completely unrelated.

I'm really not happy unless I have about six different projects going on, enabling me to flit between them at will. For example, in addition to bookbinding, I'm learning to paint war-gaming miniatures. Most people get into this by way of playing the actual games, but I do it just because I think it's fun and a good exercise.

To be clear, here's what this involves: You start with a tiny, grey plastic or metal figurine from a place like Games Workshop or Reaper Miniatures. You apply paint. Lots of it. Many times. Sometimes, you curse. Eventually you end up with a full-color statuette in some degree of artistry. Typically, you then send the model off to war, using dice and codices to rain destruction upon other models like it.

Brian, of course, was the one who introduced me; he's an avid player of Warhammer in both its 40k and Fantasy incarnations. He probably owns models from nearly every civilization in the 40k range and, for several of them, has armies in varying degrees of completeness, all of which he paints himself (have a look: Allerka on DeviantART).

I do believe he saw in me a potential gaming disciple or reliable opponent, possibly both, but I never showed much interest in the games. He, being a cunning man, therefore tempted me, a crafty girl, by offering me models to paint. I suppose he hoped I'd paint so many models they'd just end up as an army, and then, well! I'd surely want to use that army. Unfortunately, I'm both stubborn and interested in diversifying, so I still have nothing resembling even a ragged army, just a lot of totally unrelated, meticulously painted models.

Here, for example, is an Elven sorceress, both buxom and scantily clad, not to mention clearly unable to move her legs:

I've been working on her for probably a couple months, on and off, and as you can see the paint job is very nearly complete. Really all that's wanting is to clean up a few blotchy spots and then perhaps add some embroidery to her cape.

I'm very proud of her sword, so let me show you a closeup:

There are two ways to paint a metal surface such as a sword: (1) using metallic paints, which contain tiny metal flakes to give the paint a natural shimmer, or (2) using regular nonmetallic paints, which are less flashy and require more finesse to actually look like metal. In the past I've had mixed results with metallic paints -- they tend to get out of hand and just look gaudy. I was quite sure this model didn't need any gaudy, cheap metallic tricks, so I took a stab (hurr hurr) at nonmetallics and here's the result. Easier than I expected, as it turns out.

As I was looking for advice on painting the look of steel, I stumbled across a technique for painting a chrome look. Now, the soul of artistry is getting distracted by sorta cool things you're not sure you could ever use but they're cool, dammit. So, naturally, I grabbed the first suitable model I could find to practice on and achieved... well, kind of a chrome look on the leg and back plates of this Tyrannid bug.

So, that still needs some work before it's as convincing as, I don't know, this pantswetting chrome warrior. But it'd be a boring world if everything we tried went just right the first time.

Hm... I had more to share, but it's rather late, so that'll have to do for now. Perhaps I'll post again tomorrow. Until then, be crafty!

The Tome, part III: Structure

Chairete! (That's Attic Greek for "Hello, everyone!) How about a view of the top of my head while I'm working?

I've been making progress on the journal. I've gotten the spine stitched, glued, rounded, and backed. I've stitched in headbands -- making them myself was easier than trying to find a place nearby that sells them pre-made. Here's a picture of the book with all these things accomplished, except the rounding and backing:

Sewing thread isn't quite thick enough for a headband, which needs more of a heavy floss to look good, but that was all I had. Rather than go out and buy something thicker, I decided to make a project of twisting the thread I had, four-ply, into a thicker strand. This would have been absolutely pointless if it weren't an excuse to use Grandpa Parker's hand-drill, but it was, so as a matter of fact it was a complete win.

With the spine all set, I cut cover boards and laced them onto the cords. May I now present to you... structure!

From the inside, the book looks pretty nearly finished -- it just needs a cover on the spine.

The next step is to find leather and start covering the...covers. Cover boards. Decorating them. There.

That means the prettiest pictures are yet to come, so stay tuned for part IV!

Go to: Part II | Part IV

The Tome, Part II

Where to begin the new journal project? The cover materials and design will be vital to the final effect, but the structure of a book starts with its paper. In any book, that's what you spend most of your time looking at, at least as a background to the ink of its words; but with a journal, all there is at first is paper.

So, a good start means good paper, which means this time I can't just use normal printer paper. It's too plain and familiar, for one thing, but also too bright white, too flimsy, and just not at all suitable for a proper tome. So, I want paper that's at least off-white and of a decent weight, if not even luxurious. It also has to come in a large size. Most importantly, since this is a tome and I know its owner will do right by it, I fully expect ink and quill to be in regular usage, so it has to accept India ink without bleeding or spreading in weird ways. I found a few candidates:

  • Manila drawing paper, 40# 12" x 18". Plenty heavy and inkable, the sheet size would allow for 9" x 12" pages, very respectable. However, it's maybe a little too heavy and too far from white.
  • Strathmore 400 series drawing paper, 80# 12" x 18". Same size as the previous, it's off-white and should take ink just fine, but it's a bit dear and holy cow does it only come in that cardstock weight?
  • Southworth ivory parchment paper, 24# 11" x 17". This stuff looks nice. It's the right weight, it's off-white, and should be thick enough to prevent bleeding. I'm a little apprehensive about the variegated color, which could affect legibility, but hey, it'll look more like an actual old manuscript, which is great.
  • Color copy paper, 28# 11" x 17". Just included as a last resort; it's bright white printer paper, so ew, but it comes in appropriately large ledger-size sheets and has a respectable, not-too-heavy weight. Also it's cheap and so would allow for a very high page count.

In the end, I ordered the parchment paper. This was a good choice. Here's my test page, once I got it in person, being subjected to every writing utensil I could think to use -- ball-point pen, pencil, calligraphy ink in various colors, and finally Sharpie:

The calligraphy ink was completely invisible on the reverse, and it took a thick Sharpie to produce even mild bleedthrough. The pencil lines weren't even as hard to read as I'd feared. Pretty much any journal I've ever written in can go suck it.

So, I proceeded to fold twelve signatures of four sheets each, making for a book of 96 leaves or 192 pages. Final dimensions of each page: 8.5" x 11". That's larger than all but the big art books on my shelves, so I think my scale condition is satisfied -- and with what style! I'm having an affair with this paper.

Don't give me that look, I'll NEVER apologize for love.

TO BE CONTINUED! Next up, I'll show you the stitching and gluing of the spine, maybe more if I get a lot achieved.

Go to: Part I | Part III