Showing posts with label rebinding. Show all posts

The Lord of the Rings, part I: Three into one

You ever get into those pissing contests where you try to do something for the longest time or prove you have the most of something or make the biggest thing just to see if you can? Maybe it's not even that advisable, but man didn't make it to the moon by sitting at home worrying about whether it was a dumb-shit thing to do just to prove you could do it—you know what I mean?

What I'm trying to say here is that I've taken a three-volume boxed set of The Lord of the Rings and I'm going to put it all between one set of covers.

The fact that I don't have a lot of cover board in stock has nothing to do with this, nor does my fetish for combining bookbinding with chainmaille as soon as humanly possible and I have this vision of a sheet of fine maille draped over an absurdly wide leather book spine. Just, okay, just picture this monstrous concoction on your bookshelf taking up more attention span than the entire Encyclopedia Brittanica. It's going to be beautiful and, somehow, I hope to God, not prone to structural collapse.

So here's what I started with.

Pretty unexciting mass-market paperback boxed set of the trilogy. I stripped off the covers and spines, then whittled out pages that I wouldn't need. The single-volume edition will only need one map section, whereas currently I have three. Really just need one copyright page too. Actually, all these title pages should get consolidated into one. Stuff like that. I printed off a few custom pages to tip in where needed and make the whole thing cohere.

Speaking of cohering, it soon became obvious that no amount of fresh glue was going to bring these three volumes into one, not without two very obvious parts in the spine. I decided the way to make everything work out was to first break the whole thing down into much smaller chunks, then bring all those together so as to avoid two big obvious breaks in favor of many little ones. Alvenh Channe led the way with this excellent tutorial on overcast sewing, a technique designed for single sheet binding.

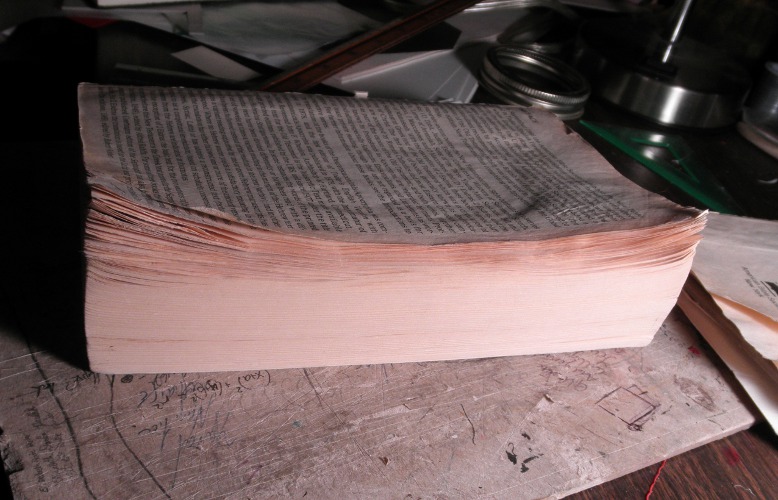
So, after some quality time with a very sharp knife and an incredibly tiny drill bit, I got my signatures all ready for stitching. After even more time with a needle and a good amount of thread, I finished up with this wonderfully monstrous cinderblock of text:

I don't know about you but I'm pretty excited to see this thing on a bookshelf once it's all grown up.

Some stats, if you're into numbers at all: It has 1137 pages of content for 591 total sheets of paper (with title pages, tables of contents, etc.). The pages are chunked into 16-sheet groups, of which there are 37, each with 10 holes. The needle passes through each of these holes twice, so that's 740 stitches. Number of times I stabbed myself with the needle: just once!

A Little Princess

Last summer I wanted to re-bind a bunch of old paperbacks. I finished Wuthering Heights by Emily Brontë, then started on A Little Princess and a compilation of Emerson's essays. I got to the point of needing to decorate the covers, felt stumped, and got distracted with other things.

A couple nights ago, riding on momentum from finishing up another project, I finally felt inspired and started working on the Princess binding.

I was really going for the Princess theme here.

I was careful to get photos of every step in the process on this book, so now I have a montage of my paperback re-binding process.

I start by stripping off the old cover and sanding the spine down to the glue. To reinforce the spine, I sink hemp cords about 1/8" in, through the glue and just a little into the paper. Endpapers are tipped in at this point, and then it's on with the super and lining. Hand-stitched headbands complete the text block.

Meanwhile, I assemble the case by fitting new cover boards onto a piece of manila folder. This gets covered and decorated before it is finally ready to attach to the text block. Everything goes together, sits overnight under pressure, and the process is complete!

By the way, this book is available for sale here.

Structure of a commercially bound book

I've been interested in the many different ways to stitch a book's pages together. I started out by learning the structure of a book on cords, which I think is a fairly typical structure for a hand-bound book. It's far from the only one, though, with perhaps the most obvious alternative being the Coptic binding, which uses no cords. I've been compiling a gallery of spine structures in this flickr gallery, if you're curious.

Here's a structure which most artisans typically wouldn't bother to learn, since it's a mass-produced structure assembled by machine. It uses thread and is a little more sturdy than the ubiquitous glue-only perfect binding. I found it in a bonded leather Bible I was taking apart recently, and I suspect it's the structure behind most mass market hardcovers.

Why learn it? Only for re-binding purposes; in my case, the client wanted a section removed from the text block, and I had to figure out how to sew back together the two parts on either side that I had left.

As you can see, there are no cords or tapes. On the inside, at the center of each signature, lengths of thread are visible; in the book I worked on, there were four, though I've only drawn three here.

The structure has most in common with a Coptic binding insofar as the stitches are chained together by looping around each other, rather than passing around a cord or getting sewn through a leather spine.

Unlike in a Coptic binding, there are multiple leads instead of just one. Each pair of adjacent holes represents one lead of thread. The needle goes in the first hole of the pair, jumps down to the other on the inside of the book, passes out and forms a lark's head around the stitch below it, then passes in and jumps back up to the first hole. From there it passes out and into the next signature, then repeats.

This forms one chain of herringbone stitches and one chain of simple stitches for each pair of holes. On the inside, doubled lengths of thread are visible with short gaps between them. (In a Coptic binding, the threads are not doubled and there are no gaps.)

The binding I worked with seemed quite sturdy; though it was about a hundred years old, none of the stitches had broken, though the glued backing was cracked into two sections. It was also quite easy to work with once I found the pattern. I was able to cut out the undesired group of pages, then tie in new lengths of thread on the four leads to sew the one loose signature onto the rest of the text block. I then covered the spine with glue, added super, and cased it in to a leather cover.

Another Bible re-bind: full leather

It seems that, in the province of books with sentimental value which are falling apart and need an inexpensive re-bind, Bibles are king.

That's all right though. Someone who wants a not-too-fancy leather binding is someone giving me a chance to practice simple bindings in leather, and there is no greater pleasure than working with genuine bookbinding leather.

The Art of Racing in the Rain

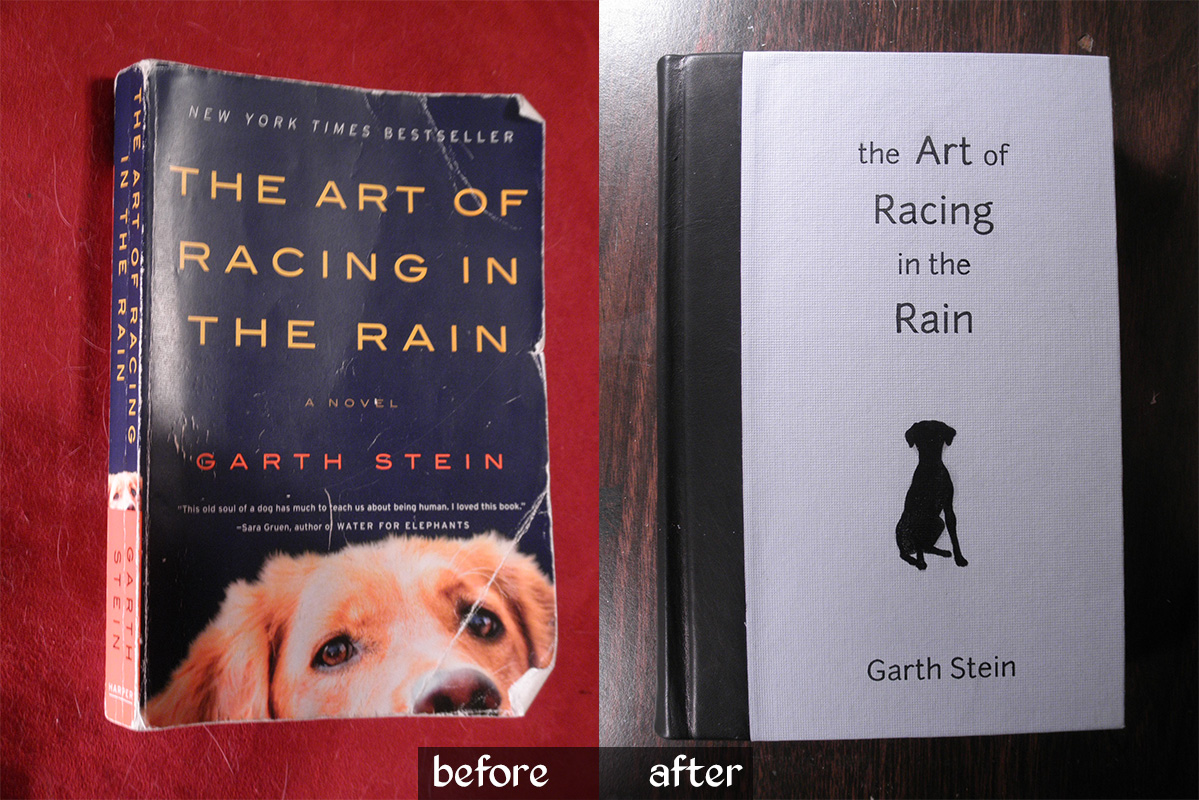
This book was not what I expected, so I'm glad I read it before I bound it! For some reason I expected it to be about a dog who loves chasing things—you know, good old-fashioned foot-racing.

In fact, this turned out to be a charming, meaningful, and reflective book, written from a dog's perspective, with the rare power to hold my attention while talking about car races. It was reminiscent of the classic Zen and the Art of Motorcycle Maintenance, and certainly a worthy evening's read.

With three themes of its content in mind—dog as armchair philosopher, car races, and rain both real and metaphorical—I set about designing its new look. Enzo the dog takes the main focus, as on the standard cover, this time as a silhouette but with remarkably similar ears. The racing theme found its way onto the endpapers in the form of flying checkers, and a pale blue cover paper sets the rainy theme. For just a touch of class, I used black leather on the spine.


Oh, and I really love adding hand-stitched headbands to books.


I was a little crunched for time on this; my brother wanted it as a birthday present for a friend.  Were I to try again with more time, I'd add some silver detail on the cover—or maybe orange?  I do love blue and orange, and it would maintain more of the original look.

I'm also not entirely happy with the typesetting of the title. Normally I would spend hours obsessing over that!  I might have tried making the dog silhouette full bleed on the left, right against the black leather shoulders, with the title set more to the right... oh well.  It's done now, and all concerned parties have communicated their satisfaction.

Two things that went quite well this time were the spine and the insides of the covers.  I finally realized that I need to crease the shoulders so that the spine is much wider than the text block.  This gives the French grooves more definition, allows the book to open without wrinkling the leather, and gives me wiggle room so that the spine doesn't end up narrower than the rest of the book (a BAD problem).  As for the insides of the covers—by which I mean the cover material which wraps around to the inside—I achieved a very clean, even, square edge on both the paper and leather portions this time around.  Weirdly uneven lumps under the endpapers are not cool!

Family Bible, part III: finished

Today I put the finishing touches on my commissioned re-binding of a paperback CCD Bible. I am extremely pleased with the results and I hope my client will be as well!

The plan was to use red Italian (Cialux) book cloth to cover the cover boards. While I love the look of this fabric, I was at first not entirely sure how I'd put a title on it—I don't have the tools or skills to gild it or screen print it, and the laser printer I used on the paper-covered Plato books would probably not work so well on cloth. However, I remembered back to Brian's Tome and decided the best thing to do would be an embossed look.

I was able to achieve this by cutting the letters out of a sheet of cardstock and pasting it over the front coverboard. The effect is subtle, but combined with the very bold lettering (traced directly from the original cover), it shows up well and has quite an impact. Unfortunately my camera is no good at capturing it—you need to hold it in your hands to really enjoy the effect.

As I mentioned in the previous post, I felt that this book would be incomplete without headbands. By an odd little bit of irony, I'm too lazy to get hold of machine-made headbands, so I defaulted to the more work-intensive task of handmade headbands.

These are stitched directly onto the text block, with the tie-downs passing between pages and through the kraft paper backing rather than through signatures. I used top-sewing upholstery thread over a core of whipping twine, and followed this excellent tutorial.

The book has a very nice profile when lying open. I think this may be the cleanest execution of covering and endpaper paste-down that I've managed so far.

Finally, my client had asked for me to incorporate the inside of the original front cover, if possible, because it had the family name written in it. So here is a shot of the old cover snuggled onto the inside of the new front cover—though I blurred the name for privacy.

Family Bible, part II

Work continues on the CCD Bible. The goal was to get most of the work done this weekend, and I did in fact get everything structural done. The first task was straightening out the curled page corners. First I tried pressing them, which did nothing, so I progressed to a medium-heat iron. That did the trick. The pages are not perfectly flat, but they are lying straight now and I'm thinking that, after they are pressed in the final stages, they will condense more.

With that taken care of, the text block was ready to be prepared for a hardcover structure. I tipped in the detached first two pages and then added endsheets on top of those. The endsheets are a plain but high-quality, ivory, 100% cotton paper; this seemed more suitable to the plain, functional purpose of the book than something with a pattern.

Once the endpapers were in place, I covered the spine with cheesecloth super and kraft paper after adding a marker ribbon. The text block is now ready for casing in -- at least, unless I figure out a way to add headbands, which I really want to do.

Meanwhile, the cover was coming together. The boards are 0.080" Davey board, pasted onto a manilla-folder spine per my usual construction. The next step is to cover them with cloth, but before that happens I need to try printing onto the cloth.

Stay tuned for the final stages: finishing the cover boards, and then using them to case in the text block!

Family Bible

Hello everyone! I haven't posted in a while -- I actually have sort of a day job now, which I absolutely love but it does leave me with less time to play around at home. I do, however, have a new project.

This paperback Bible was with my client and her siblings all through CCD school. It has suffered the complete detachment of its front cover, and the first 200 or so pages are curled at the corner.

The spine, however, is in surprisingly good shape, and most of the pages are intact despite the curling.

In its current state, this book is not fully usable, but the sentiment it carries makes it worth saving. I will therefore be reinforcing it and giving it a new, red cloth cover.

More pictures to follow as I progress.

Plato's Makeover - completed

Good afternoon! I'm back, and I've brought books: two new hardcovers for a professor's library. Click for larger images:

My last post was a WIP shot of rebind work on my dad's Plato paperbacks, and now here are the finished products. They are perfectly matched. Their Greek titles, Gorgias and Politeia, were printed via laser printer onto the cover material and positioned over a rectangular piece of cardstock. Once the cover was glued, I used my bonefolder to find the edges of the cardstock, producing a raised effect.

The cover paper is a thick, creamy cardstock with metallic gold swirls, and the spines and corners are dark forest green (though they look a little black in these photographs). I went with navy blue for the endpapers, a paper with tiny bits of gold tinsel to pick up the metallics on the cover.

One of the books came with a special task. Dad has a little notebook that he used to keep binder-clipped to the back cover of the Gorgias, not a very permanent solution when the re-binding happened. So, I fashioned a pocket for the inside of the back cover which perfectly fits the notebook.

More projects to come soon. I'm working on a re-bind of A Little Princess which I will post as a photodocumentary of how the process works, and I've also got another big project from my muse of epicity, Brian.

Plato's Makeover

Good afternoon! I've figured out a specific line of work for myself, and the first project is under way now. It was my dad's idea. He's a professor of philosophy, and here's his copy of Plato's Gorgias which is older than I am:

As you can see, it's not in good shape. The spine has cracked down the middle, and pages are falling out. He'd buy a new copy, but this one is full of two decades' worth of notes. It's a perfect candidate for re-binding.

While I'm working on the Gorgias, I'll also re-bind Dad's classroom copy of the Republic as a matched companion. Here they are with newly reinforced spines, waiting for a shipment of nice papers so I can make their covers.

I'll keep you all posted and show you finished pictures soon!

Rebound paperback: Wuthering Heights

I was always more fond of Jane Eyre than I was of Wuthering Heights, but this paperback copy of Emily Bronte's classic novel was too inviting to pass up. It wanted a dark but romantic and thoroughly Victorian look.


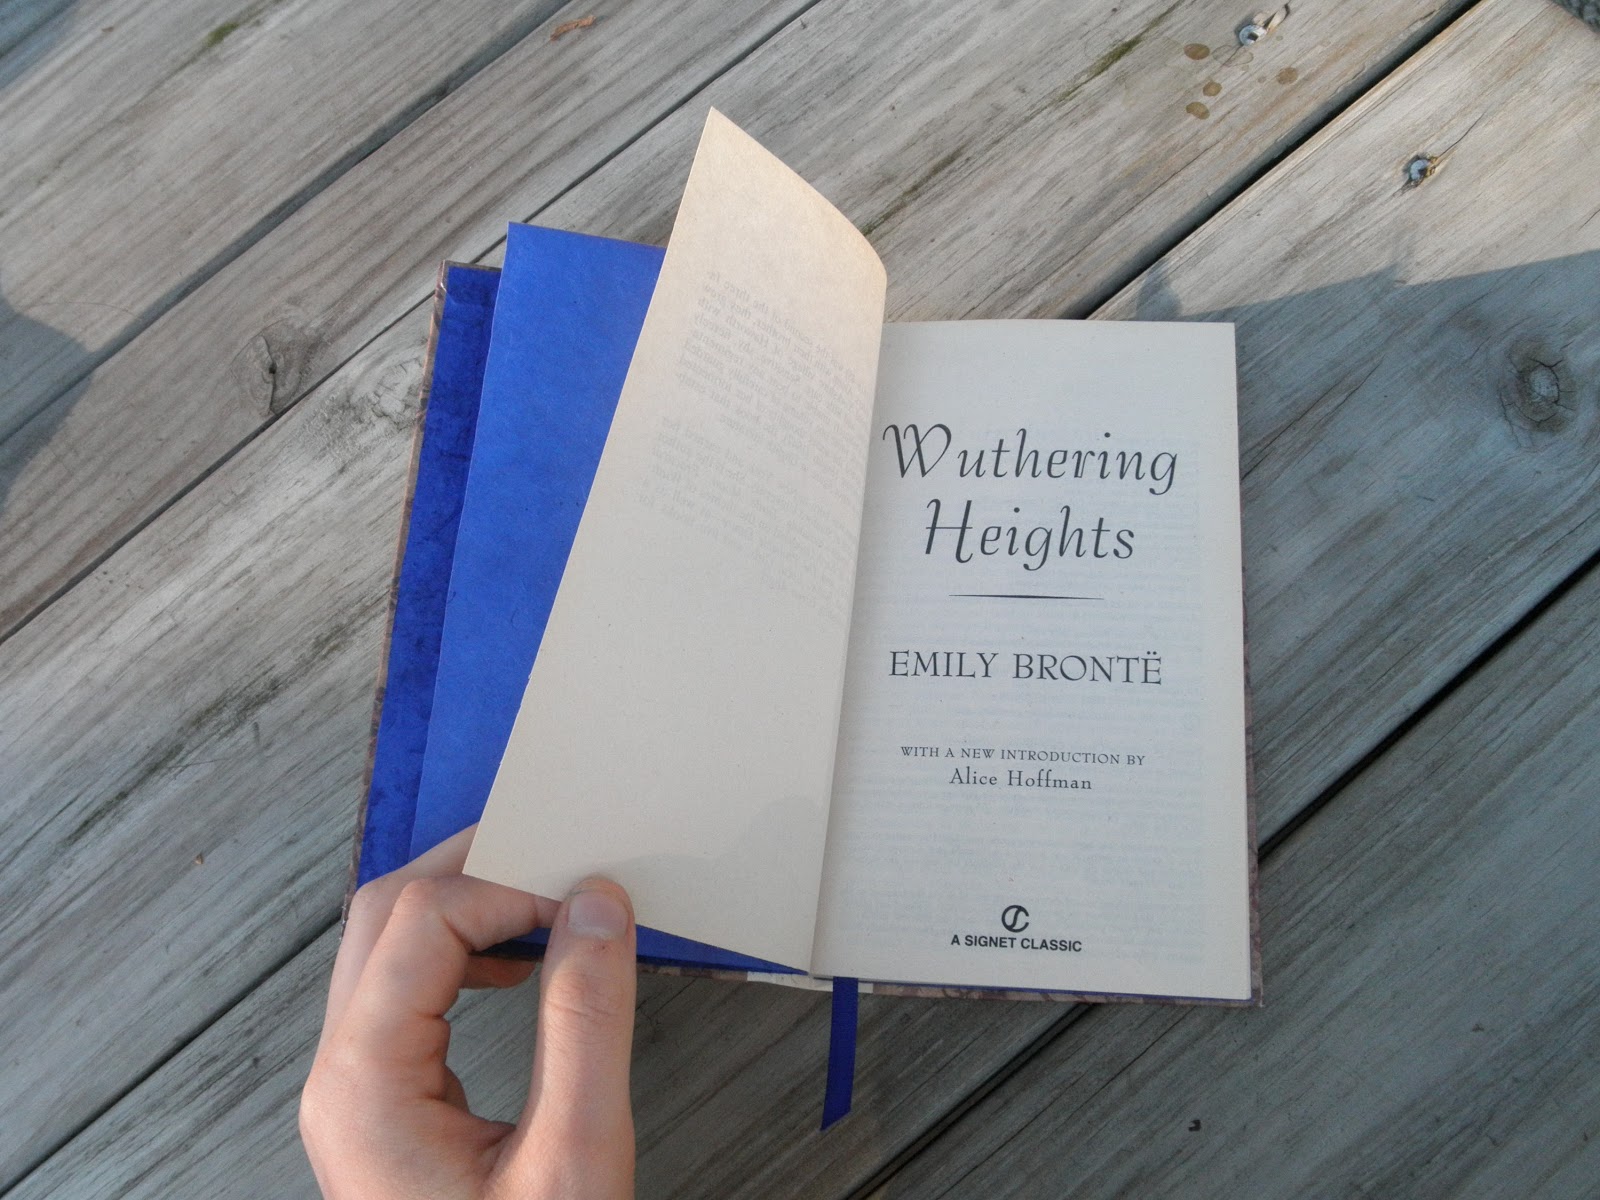
I gave it the full treatment to make for a sound new hardcover: cords sunk and glued into the spine for strength, a cheesecloth hinge to attach the cover. Putting the cover together was something of a trial. I knew I wanted to use this floral brown printed paper with a cream spine and ivory endpapers. However, I didn't have a long enough strip of the cream paper to cover the spine, so I had to come up with the brown spacer strips you see in the final product.

Then there was the title. I'm not a practicing calligrapher, but I have practiced, I'm comfortable with an ink pen, and my natural handwriting isn't bad. So I inked a couple dozen practice titles before taking on the real thing. I'm happy with the result, but I wish I had practiced the sans-serif author name a little more; it was supposed to be cleaner and very blocky. Still, I'm pleased and I know I'll get better.

I was, however, extremely pleased to find a ribbon in precisely the same shade of indigo as the endpapers.

This book is available for sale from my Etsy store.

Sneaky dictionaries: French and German

The books I mentioned in my last post are now finished. I took a paperback French phrasebook and a German/English dictionary, removed their old covers, sanded down their spines, and treated them to hard covers. They are now case-bound books with cloth hinges. First up is Charles Berlitz's "Passport to French" phrasebook:

As I was deciding how to decorate the covers, I realized I had a perfect opportunity to make these books interesting: don't include a title. In fact, don't include any identifying marks at all. The result is an unobtrusive little hand-bound volume which can be carried the world over without advertising its owner as "not from around here."

Next we have the Bantam New College German & English Dictionary:

Again, stealthy, but the red, gold, and black marbled paper on the spine does subtly conjure the German flag. The book is unique and easy to spot on a shelf for the German student at home. It might make for a pretty gift to a German language student.

Here's a quick shot of the hollow spine I was so excited about in my last post:

Both dictionaries are available on my Etsy store (which also has more pictures).

In progress: rebinding paperbacks

A quick trip to my library's bargain used book corner landed me with $6 worth of ready-made text blocks to practice binding. Here's what's on the workbench right now:

I don't feel bad about potentially destroying a dictionary, so this one seemed like a good guinea pig. Next up maybe I'll give Emily Bronte or Ralph Waldo Emerson a shot, and eventually I'd like to rebind my friend's Lord of the Rings trilogy and my own Elements of Euclid.

In addition to the German/English dictionary, I also have an ancient Passport to French book under surgery. Here they both are with endpapers and mull applied; the French book has an elegant, subtle pinstripe on the endpapers, while the German book has ivory 100% cotton endpapers.

I'll be casing them in once their covers are done drying. Speaking of, here's my new favorite tutorial for making the cover: Dave's Book Tutorial. His advice to use a manila folder makes for a lovely joint, and the spines of these books will be hollow (finally!). Plus, easy-peasy very pretty French groove = bonus!