The difference between a craft that I try once, think is really cool, but then don't keep up with, and one that I keep coming back to and improving my skills in, is a good workspace. The space I have is small – just a corner of my bedroom – but it has a few features that allow me to really focus and enjoy sitting down to work on my books.
First and foremost, there is ONE rule about the desk, only one, but it is unbreakable. The rule is this: No computers.
Ever.
Not mine, not my friends'. Not for a minute or an hour.
Laptops, iPads, tablets, they can go everywhere else in the world, but this is my ZONE, my artistic space. It is sacred and protected from the mundane ubiquity of technology, the cluttered space-hogging of keyboards, and the idle drudgery of facebook. (It's a little funny because my real work these days is as a web page designer, so I also work at creativity on a computer; but that has its own, different, space.)
There are no other rules for the workspace, not about keeping it clean and organized, or having only one project at a time, or anything like that, because I tend to find them stifling. I enjoy the primordial soup, as it were, of a busy desk area. I leave the organization to habit and necessity; it is a small enough space that things can't get too far out of hand.
Now for the actual physical features...
- Twin bright desk lamps: First of all, they're practical; overhead light alone is just not going to cut it. Having two of them allows me to move them around so they cancel each others' shadows. Second of all, when I sit down at my desk and lean forward to switch on these two lights, flooding my work area with all the photons I could ever want, it puts me in a mindset that I'm really working on stuff now, not fooling around half-heartedly. It's time to get in the zone.
- Rare earth magnet: You can't see it, but there is a large, cylindrical, neodymium magnet stuck to the base of one of the lamps. It holds my sewing needles and a collection of paperclips. Again, it's practical because it keeps me from losing track of sharp things somewhere in the chaos of the desk, and fun because, well, magnet! Done sewing – snick!
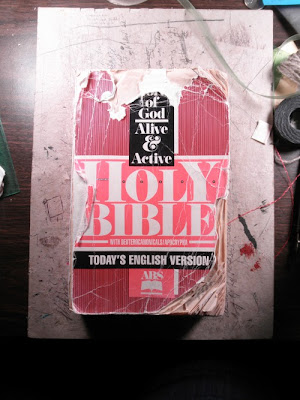
- Cutting board: The board in the center of my desk is my main work surface. It protects the wooden desk underneath from glue and knife blades, offers a convenient writing surface for calculations and quick sketches, and hold a place against the encroaching chaos of the tools and materials around it.
- Books: Kept close at hand on a hutch are the majority of the books I may need. The bottom shelf is full of instructionals and art books. Just above it is what I consider the "display shelf", with an assortment of Folio Society editions and other pretty bindings. It's good to have them close by for those moments when I need a role model or structural reference – and they work as a heavy, flat weight in a pinch.
- Paper, board, and cloth storage: I have paper in stacks in one of my desk drawers. I have a plastic sleeve tacked to the inside of the desk by my left knee, full of sheets ready to hand. I have huge rolls of paper leaning in a corner of the room, and a pile of boards and cheap kraft paper on the floor. None of it is more than eight feet from me at any moment.
- Cat – or more specifically, designated cat roost. It's a foregone conclusion that she is going to supervise my work. Might as well accept it and give her a place of her own. I'm always amazed that she, for her part, accepts the cushion.
Admittedly, this isn't quite the whole story. My dad, who shares my philosophy that a good craft needs a good space and good tools, has an entire basement room of the house devoted to woodworking. A surprising number of woodworking tools are very useful for bookbinding as well, so I make trips to the basement for certain portions of the binding process.
I would love to have a larger area – a huge slab of a table with cutting, gluing, and leather-skiving stations; whole storage bins full of supplies, with cubbies and shelves for all my paper sheets; space for a sewing frame and a book press; and a miniature workshop-within-a-workshop for gold leafing. It won't be happening any time soon and certainly not while I'm living with my parents, but it's something to work toward. For now I get along quite happily with my well-lit, magnet-endowed little space. I hope this maybe gave you some ideas for your own space!


