Metacrafting: the bookbinding workspace

The difference between a craft that I try once, think is really cool, but then don't keep up with, and one that I keep coming back to and improving my skills in, is a good workspace. The space I have is small – just a corner of my bedroom – but it has a few features that allow me to really focus and enjoy sitting down to work on my books.

First and foremost, there is ONE rule about the desk, only one, but it is unbreakable. The rule is this: No computers.

Ever.

Not mine, not my friends'. Not for a minute or an hour.

Laptops, iPads, tablets, they can go everywhere else in the world, but this is my ZONE, my artistic space. It is sacred and protected from the mundane ubiquity of technology, the cluttered space-hogging of keyboards, and the idle drudgery of facebook. (It's a little funny because my real work these days is as a web page designer, so I also work at creativity on a computer; but that has its own, different, space.)

There are no other rules for the workspace, not about keeping it clean and organized, or having only one project at a time, or anything like that, because I tend to find them stifling. I enjoy the primordial soup, as it were, of a busy desk area. I leave the organization to habit and necessity; it is a small enough space that things can't get too far out of hand.

Now for the actual physical features...

  1. Twin bright desk lamps: First of all, they're practical; overhead light alone is just not going to cut it. Having two of them allows me to move them around so they cancel each others' shadows. Second of all, when I sit down at my desk and lean forward to switch on these two lights, flooding my work area with all the photons I could ever want, it puts me in a mindset that I'm really working on stuff now, not fooling around half-heartedly. It's time to get in the zone.
  2. Rare earth magnet: You can't see it, but there is a large, cylindrical, neodymium magnet stuck to the base of one of the lamps. It holds my sewing needles and a collection of paperclips. Again, it's practical because it keeps me from losing track of sharp things somewhere in the chaos of the desk, and fun because, well, magnet! Done sewing – snick!
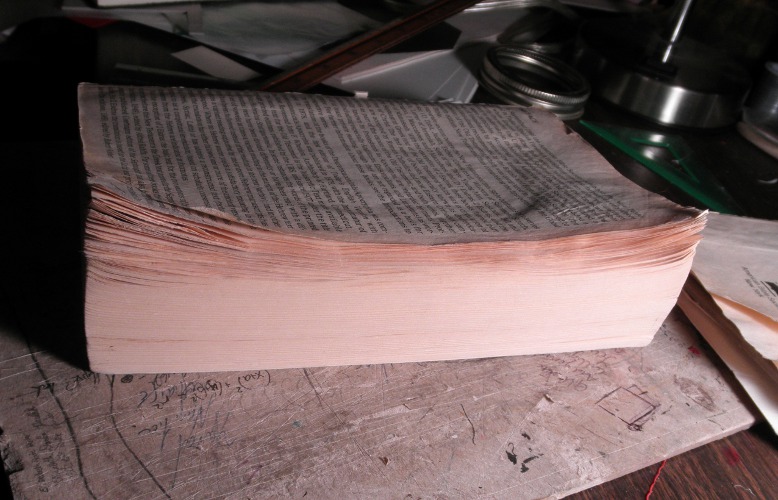
  3. Cutting board: The board in the center of my desk is my main work surface. It protects the wooden desk underneath from glue and knife blades, offers a convenient writing surface for calculations and quick sketches, and hold a place against the encroaching chaos of the tools and materials around it.
  4. Books: Kept close at hand on a hutch are the majority of the books I may need. The bottom shelf is full of instructionals and art books. Just above it is what I consider the "display shelf", with an assortment of Folio Society editions and other pretty bindings. It's good to have them close by for those moments when I need a role model or structural reference – and they work as a heavy, flat weight in a pinch.
  5. Paper, board, and cloth storage: I have paper in stacks in one of my desk drawers. I have a plastic sleeve tacked to the inside of the desk by my left knee, full of sheets ready to hand. I have huge rolls of paper leaning in a corner of the room, and a pile of boards and cheap kraft paper on the floor. None of it is more than eight feet from me at any moment.
  6. Cat – or more specifically, designated cat roost. It's a foregone conclusion that she is going to supervise my work. Might as well accept it and give her a place of her own. I'm always amazed that she, for her part, accepts the cushion.

Admittedly, this isn't quite the whole story. My dad, who shares my philosophy that a good craft needs a good space and good tools, has an entire basement room of the house devoted to woodworking. A surprising number of woodworking tools are very useful for bookbinding as well, so I make trips to the basement for certain portions of the binding process.

I would love to have a larger area – a huge slab of a table with cutting, gluing, and leather-skiving stations; whole storage bins full of supplies, with cubbies and shelves for all my paper sheets; space for a sewing frame and a book press; and a miniature workshop-within-a-workshop for gold leafing. It won't be happening any time soon and certainly not while I'm living with my parents, but it's something to work toward. For now I get along quite happily with my well-lit, magnet-endowed little space. I hope this maybe gave you some ideas for your own space!

Family Bible, part III: finished

Today I put the finishing touches on my commissioned re-binding of a paperback CCD Bible. I am extremely pleased with the results and I hope my client will be as well!

The plan was to use red Italian (Cialux) book cloth to cover the cover boards. While I love the look of this fabric, I was at first not entirely sure how I'd put a title on it—I don't have the tools or skills to gild it or screen print it, and the laser printer I used on the paper-covered Plato books would probably not work so well on cloth. However, I remembered back to Brian's Tome and decided the best thing to do would be an embossed look.

I was able to achieve this by cutting the letters out of a sheet of cardstock and pasting it over the front coverboard. The effect is subtle, but combined with the very bold lettering (traced directly from the original cover), it shows up well and has quite an impact. Unfortunately my camera is no good at capturing it—you need to hold it in your hands to really enjoy the effect.

As I mentioned in the previous post, I felt that this book would be incomplete without headbands. By an odd little bit of irony, I'm too lazy to get hold of machine-made headbands, so I defaulted to the more work-intensive task of handmade headbands.

These are stitched directly onto the text block, with the tie-downs passing between pages and through the kraft paper backing rather than through signatures. I used top-sewing upholstery thread over a core of whipping twine, and followed this excellent tutorial.

The book has a very nice profile when lying open. I think this may be the cleanest execution of covering and endpaper paste-down that I've managed so far.

Finally, my client had asked for me to incorporate the inside of the original front cover, if possible, because it had the family name written in it. So here is a shot of the old cover snuggled onto the inside of the new front cover—though I blurred the name for privacy.

Family Bible, part II

Work continues on the CCD Bible. The goal was to get most of the work done this weekend, and I did in fact get everything structural done. The first task was straightening out the curled page corners. First I tried pressing them, which did nothing, so I progressed to a medium-heat iron. That did the trick. The pages are not perfectly flat, but they are lying straight now and I'm thinking that, after they are pressed in the final stages, they will condense more.

With that taken care of, the text block was ready to be prepared for a hardcover structure. I tipped in the detached first two pages and then added endsheets on top of those. The endsheets are a plain but high-quality, ivory, 100% cotton paper; this seemed more suitable to the plain, functional purpose of the book than something with a pattern.

Once the endpapers were in place, I covered the spine with cheesecloth super and kraft paper after adding a marker ribbon. The text block is now ready for casing in -- at least, unless I figure out a way to add headbands, which I really want to do.

Meanwhile, the cover was coming together. The boards are 0.080" Davey board, pasted onto a manilla-folder spine per my usual construction. The next step is to cover them with cloth, but before that happens I need to try printing onto the cloth.

Stay tuned for the final stages: finishing the cover boards, and then using them to case in the text block!

Family Bible

Hello everyone! I haven't posted in a while -- I actually have sort of a day job now, which I absolutely love but it does leave me with less time to play around at home. I do, however, have a new project.

This paperback Bible was with my client and her siblings all through CCD school. It has suffered the complete detachment of its front cover, and the first 200 or so pages are curled at the corner.

The spine, however, is in surprisingly good shape, and most of the pages are intact despite the curling.

In its current state, this book is not fully usable, but the sentiment it carries makes it worth saving. I will therefore be reinforcing it and giving it a new, red cloth cover.

More pictures to follow as I progress.

Army book for Warhammer 40k - Lords of Oblivion

My friend Brian approached me a while ago with a new project idea. I've mentioned that he's an avid player of Warhammer 40k, a tabletop war game. He has put together many small armies' worth of plastic miniatures and has designed his own Chapter of Space Marines within the 40k universe: the Lords of Oblivion.

All the information pertaining to this Chapter—its history, descriptions of the major characters in the army, "fluff" as the players call it, and then all the stats and mechanics for actual gameplay—would constitute a small book. In fact, it does constitute a small book. That's where I come in.

Brian commissioned me to make a large, ornate book to hold the description of his army and all the reference material he needs during gameplay. The trick is that the pages need to be removable, in case he edits part of it later down the line. A 3-ring binder would suit this, but would break the illusion of being a real and proper book, so I decided to build the book like a photo album, using screwposts. This wonderful screwpost-construction grimoire served as my chief inspiration, and here's the working part of mine:

There's a narrow flap of paper that folds down over the screws to keep them hidden. The book will hold about 60 sheets of paper, which is more than plenty for Brian's needs.

The cover material is faux leather (vinyl)—yeah, I wish it were the real thing, too. The corner braces, however, are the real deal: chunks of metal riveted right onto the book. I took brass-plated angle braces from a hardware store and gave them a hammered finish using a ball-peen hammer. They're heavy; you really feel them as you open the book.

The gemstones are pearlescent snap heads with the snap portion filed off. They're epoxied in place and unlikely to budge. The rivets were cut off a 3/16" brass rod and peened over, and can I just say that hammered rivets are drop-dead sexy?

Brian did all the typesetting for the interior. The original plan was to print everything on parchment paper, but we ran up against a time crunch and he had to make do with a first run of plain printer paper. The lore isn't actually completely written, yet; I'm hoping that, when he finishes it up, he'll be able to do a more official run on the nice paper.

Okay, so that's all the behind-the-scenes talk out of the way... let's do a quick evaluation. Good features: The color balance between the tan leather-look and the green gemstones and ribbon is very pleasing, and the heavy use of brass finish works nicely to dress up the book.

Bad features: I really don't like the lettering on the front. The goal for the book was a Gothic/sci-fi fusion, but those letters seem more to be fighting with the leather and brass than working with it. Brass cutouts might have worked better. The result is a sort of middle-school craft project clash of ideas on the front cover which needs to be smoothed out before the book can shine, though the foundation is good. I'd also like to paint the emblem directly onto the leather, or onto a thin sheet, rather than onto cardstock as it is now, for further streamlining. That said, I think the interior looks great and it's already gotten some compliments, so yay!

Anyway, I hope you like the book! Brian has a few more projects like this one for me, so expect more sooner or later. Cheers!

Tiny books are cute and anthropomorphic

I am making several tiny books to sell as pendants at an upcoming renaissance faire... I quickly discovered that they have an irresistible personality!


Here's Shep, a book dog.


He belongs to these bookly citizens.


Is that...a bird?  Or a plane?


A well-dressed stranger visits the town.
The bookly citizens gather to admire her gilded wardrobe.


Shep finds something interesting.


The book boards for everyone's hard covers have arrived!  Everyone gathers to see, and the town elder claims the podium to regale them with his tale of The Day I Earned My Covers.


Suddenly, in the middle of his tale -- a GOD descends -- !
The citizens stumble backward in awe!


While the others stand frozen, the town elder steps forward, fearless.
"Are you sure that's wise?" protests the gilded newcomer.
"Perhaps not, but the spirit of ADVENTURE compels me!"


The bookly god is benevolent and takes them to see the Promised Land of Bookshelf. Someday, when all the bookly citizens have earned their covers, they will come here to live among the great ones.

To be continued...

Plato's Makeover - completed

Good afternoon! I'm back, and I've brought books: two new hardcovers for a professor's library. Click for larger images:

My last post was a WIP shot of rebind work on my dad's Plato paperbacks, and now here are the finished products. They are perfectly matched. Their Greek titles, Gorgias and Politeia, were printed via laser printer onto the cover material and positioned over a rectangular piece of cardstock. Once the cover was glued, I used my bonefolder to find the edges of the cardstock, producing a raised effect.

The cover paper is a thick, creamy cardstock with metallic gold swirls, and the spines and corners are dark forest green (though they look a little black in these photographs). I went with navy blue for the endpapers, a paper with tiny bits of gold tinsel to pick up the metallics on the cover.

One of the books came with a special task. Dad has a little notebook that he used to keep binder-clipped to the back cover of the Gorgias, not a very permanent solution when the re-binding happened. So, I fashioned a pocket for the inside of the back cover which perfectly fits the notebook.

More projects to come soon. I'm working on a re-bind of A Little Princess which I will post as a photodocumentary of how the process works, and I've also got another big project from my muse of epicity, Brian.

Plato's Makeover

Good afternoon! I've figured out a specific line of work for myself, and the first project is under way now. It was my dad's idea. He's a professor of philosophy, and here's his copy of Plato's Gorgias which is older than I am:

As you can see, it's not in good shape. The spine has cracked down the middle, and pages are falling out. He'd buy a new copy, but this one is full of two decades' worth of notes. It's a perfect candidate for re-binding.

While I'm working on the Gorgias, I'll also re-bind Dad's classroom copy of the Republic as a matched companion. Here they are with newly reinforced spines, waiting for a shipment of nice papers so I can make their covers.

I'll keep you all posted and show you finished pictures soon!

Rebound paperback: Wuthering Heights

I was always more fond of Jane Eyre than I was of Wuthering Heights, but this paperback copy of Emily Bronte's classic novel was too inviting to pass up. It wanted a dark but romantic and thoroughly Victorian look.


I gave it the full treatment to make for a sound new hardcover: cords sunk and glued into the spine for strength, a cheesecloth hinge to attach the cover. Putting the cover together was something of a trial. I knew I wanted to use this floral brown printed paper with a cream spine and ivory endpapers. However, I didn't have a long enough strip of the cream paper to cover the spine, so I had to come up with the brown spacer strips you see in the final product.

Then there was the title. I'm not a practicing calligrapher, but I have practiced, I'm comfortable with an ink pen, and my natural handwriting isn't bad. So I inked a couple dozen practice titles before taking on the real thing. I'm happy with the result, but I wish I had practiced the sans-serif author name a little more; it was supposed to be cleaner and very blocky. Still, I'm pleased and I know I'll get better.

I was, however, extremely pleased to find a ribbon in precisely the same shade of indigo as the endpapers.

This book is available for sale from my Etsy store.

Sneaky dictionaries: French and German

The books I mentioned in my last post are now finished. I took a paperback French phrasebook and a German/English dictionary, removed their old covers, sanded down their spines, and treated them to hard covers. They are now case-bound books with cloth hinges. First up is Charles Berlitz's "Passport to French" phrasebook:

As I was deciding how to decorate the covers, I realized I had a perfect opportunity to make these books interesting: don't include a title. In fact, don't include any identifying marks at all. The result is an unobtrusive little hand-bound volume which can be carried the world over without advertising its owner as "not from around here."

Next we have the Bantam New College German & English Dictionary:

Again, stealthy, but the red, gold, and black marbled paper on the spine does subtly conjure the German flag. The book is unique and easy to spot on a shelf for the German student at home. It might make for a pretty gift to a German language student.

Here's a quick shot of the hollow spine I was so excited about in my last post:

Both dictionaries are available on my Etsy store (which also has more pictures).

In progress: rebinding paperbacks

A quick trip to my library's bargain used book corner landed me with $6 worth of ready-made text blocks to practice binding. Here's what's on the workbench right now:

I don't feel bad about potentially destroying a dictionary, so this one seemed like a good guinea pig. Next up maybe I'll give Emily Bronte or Ralph Waldo Emerson a shot, and eventually I'd like to rebind my friend's Lord of the Rings trilogy and my own Elements of Euclid.

In addition to the German/English dictionary, I also have an ancient Passport to French book under surgery. Here they both are with endpapers and mull applied; the French book has an elegant, subtle pinstripe on the endpapers, while the German book has ivory 100% cotton endpapers.

I'll be casing them in once their covers are done drying. Speaking of, here's my new favorite tutorial for making the cover: Dave's Book Tutorial. His advice to use a manila folder makes for a lovely joint, and the spines of these books will be hollow (finally!). Plus, easy-peasy very pretty French groove = bonus!

New supplies!

Lucky me had a friend passing through Ann Arbor who volunteered to stop by Hollander's for me. The kind girl answering the store's phone let me call in an order at the last minute and got it ready for my friend to pick up. So, I was finally able to get some professional supplies.

The special delivery consisted of:

  • two sheets of standard binder's board and one of Davey board,
  • Italian book cloth in red,
  • a sample packet of Italian book cloth,
  • thin French linen cord for cord-bound books (no more stains or tangled hemp fibers), and
  • my very own 6" bonefolder!

I now feel like a proper bookbinding initiate.

Rose notebook

A quick update to show off my latest creation, a rose-themed notebook.


The cover was painted with metallic gold ink and then varnished. To my mild surprise but delight, the varnish picked up some of the gold color and carried it across the paper rose cutout, which is now slightly metallic as well.

The interior paper is all handmade (not by me). Half the pages are white with faint thread fibers, while the other half contain real rose petals on one side. In retrospect, I should have glued these pages with the petals facing down, to present the more writeable side of the paper. Still, the petals can be written around or notes can be taken on the reverse.


The pages are single sheets which can be torn out, making this useful as a notebook. The front cover is attached only to the back of the spine and can therefore fold out of the way behind the back cover. Here's a quick diagram of the structure:


This notebook is now available for sale on my Etsy store.

Leather stamping on a budget

Hey all, I'm back.  It's been a slow couple of weeks since my last post due to visiting relatives, a new workout schedule, and this thing where I need to get a real job.

I thought I'd write a post about how I did the leather stamping on my Tome project, since I think this info could be useful for many others starting out with leather work.

Traditionally, stamping is done with a wide array of specially designed, well, stamps: long metal rods with an inverted design cast on the end.  These range from simple alphabet stamps, to small images and maker's marks, to elaborate filigrees such as those proudly displayed on the site of this professional binder.  There are also tools made in basic shapes like circles, arcs, lines, and polygons for putting together a custom pattern; you can see some in use in this great belt-making video.  You get the idea that, to be able to tool leather the way you want, you're going to need to invest in a lot of specifically designed tools.

Unless you're very clever and patient.

Step 1: Stamp pattern

First we need to create a pattern which will be pounded into the leather to leave an imprint.  All you need for this is a cutout with well-defined edges in a material sturdy enough to withstand a bit of compressive force.  It also needs to be thick enough to sink into the leather. A couple millimeters of thickness is enough, though more is better.

Such a material is not hard to find; shockingly, even paper products will do.  My olive branch stamp was cut out of a piece of collage board.  Here's a list of possible materials and how best to use them:

  • Tagboard / matboard / collage board / layered cardstock:  Anything you can cut out of a piece of cardboard, you can turn into a stamp; it just won't last long. Use this for very customized, one-off patterns; in my case, the olive branches and the volume number "I".

    Be sure, when you cut the pattern, to keep your knife blade perpendicular to the paper; the edges of the pattern must be crisp and square for the best impression.

    Unfortunately, no matter how clean your edges are, they won't survive more than a few uses; even one test use will start to flatten them down.

  • Wire:  For lettering, knotwork designs, curlicues, or maybe even a simple filigree—so long as no strands overlap—use wire.  I used this to make the letters in "VOLUME".

    I'd recommend a thin-gauge craft wire such as the artistic wire available from Hobby Lobby, or any copper-core wire.  (Copper is best because it's soft and easy to shape.)  Square wire may be even better to get a nicer edge shape, though it is harder to find and usually available only in costly silver.

  • Wood:  If you've got a whittling bent, why not use it?  A small block of wood can be carved into any shape, with varying degrees of relief for interior detail.  However, this is likely to suffer the same problem as the paper stamp, in that the edges will lose their crispness over a few uses.

  • Metal sheet:  This would provide the best approximation of a professionally-made stamp and would last quite a long time.  However, it also requires the most special equipment: a jeweler's saw or maybe a band-saw to cut the edges, since a thin, easily cut sheet may not stamp deeply enough.  It might be possible to carve detail in the interior of the stamp, but I don't know what a metal-carving tool is and have no doubt it would make an awful sound.  Maybe a Dremel?

  • Other? I'm sure more possibilities exist...stone, perhaps?  A smattering of sand or small pebbles could produce an interesting texture, though large stones may be too brittle to endure the hammer blows.  Plastic?  Bone?   Coins?  Look around your house and see what you can find already containing an interesting shape or texture -- but be sure it can stand the impact before you test it!

Step 2: Stamping rod

Leather stamps usually come on the end of a long rod, as you recall, but there's no need for the long rod to actually be connected to the stamp.  So all you need to apply the stamp is a thick metal rod a few inches long and a hammer to hit it with.  I sawed off the end of a 1/2"-diameter steel rod that I'd gotten from ACE Hardware, then filed one end flat to lie against the stamp.  Easy.

You may think there's no need at all for the rod part of this setup—you could hit the stamp directly with the hammer—and you're not entirely wrong.  However, the rod gives you a great deal more control over where pressure is being applied, and it keeps stray hammer strokes away from the delicate leather surface (not to mention your fingers).

Step 3: Applying the stamp

Position your stamp carefully.  If it's much larger than the rod, you may want to secure it with tape.  Now, place the rod over an edge and give the top of it a firm smack or two with the hammer, taking care not to let the stamp slip.  Proceed all the way around the edge of the stamp.  Make very sure the stamp doesn't slip at all out of place, or you will kick yourself, I guarantee it.

Be sure that the rod doesn't tilt over the edge of the stamp and leave its own crescent-shaped imprint in the leather, because that will also cause you to kick yourself.  Once an imprint is in, it pretty much doesn't come out.

Most tutorials I watched recommend that you dampen the leather with a sponge before tooling.  My personal experience was that this made no difference, except maybe to dull the leather surface, and I'm not sure why.  Perhaps it varies with leather type; I was using dyed calf leather.  A thicker, stiffer leather, or a raw, untreated leather, may stand in more need of the dampening treatment.

Pros, cons, and cautionary tales

This is a great setup if you're willing to put in a bit of time making the stamps, and have a lot of these materials around or can get them easily.  Custom stamps made in this manner may well be more versatile and easier to use.  Where was I going to find an olive-leaf stamp in exactly the shape I needed?  I could use a shape-elements set like in that video I linked, but that takes a great deal of planning and care; this was quick and easy.

However, if you have to go out to buy every single one of these things—the metal rod, the saw to cut it, the file to smooth it, the wire and pliers, all these various things—then you may be better off just buying a stamp set.  It will last longer and probably look more professional.  Furthermore, this method is not much good for custom tooling, where the tool needs to slide along the surface of the leather; there, you genuinely do need your shape to be attached to the rod.

Last but not least, this method is no good at all for gold leafing.  For that technique the stamp needs to be heated and pressed down with a rocking motion (not hammered), and unfortunately no paper stamp could stand the heat.  However, if all you want is a nice blind tooling, this will do.  Alternatively, you can always apply leather paint afterward for color, which can produce amazing results, too.

I hope others will find this information as useful as I did. If you have advice or suggestions, words to scold me for my cheap, lazy ways, or remonstrations that everyone does this and I'm an unoriginal hack, I'd love to hear them in the comments. Cheers!

Interested in more cheap, clever bookbinding alternatives? Mrs. Dethe at Cursed Cauldron Creations has created a handy list. She, too, is a young bookbinder just finding her way in the craft. Go show her some love!

Tiny books

How to practice the techniques of bookbinding in a non-resource-intensive manner?


Tiny books!  Each is about 2.5" tall and 1.5" wide.  The pages were cut from sheets of tracing paper (which is suitably thin for this scale).


The first is a traditional book on raised cords with a scrap of leather on the spine, and scraps of marbled paper on the covers.  Observe: my first successful French groove!


For the second, I decided to try a coptic binding.  The first such binding I saw was a revelation; a book that shows off the stitching of its own spine?  Wait—you can do that?


Yes.  Yes, you can.  My first try was a little sloppy around the headbands, but I intend to get better.  Here's what it looks like from the inside:


I may add a ribbon to hold it closed; I think my stitches were a little too tight, because this one loves to fly open.  Like a puppy with an open door, I sweartogod.

The next project, currently in the works, is a rose-themed notebook with tear-out pages.  The paper is handmade and contains real rose petals.  Which...might be kind of hard to write on, but I'm counting on it being cool enough that nobody will mind.  (There aren't that many of them.)